Creating Sensitivity Labels in Microsoft Purview
- Doug Hemminger
- Aug 15, 2023
- 4 min read
Introduction: Understanding Zero Trust
One of the key principles of the Zero Trust security model is to verify explicitly and continuously. You want access to our environment? We will verify that you are authorized to do so using every available piece of information that we have (username, password, device health, last time you logged in, where you are logging in from, etc.). We will also authorize you only for what you are trying to access. If it's a specific document, we will validate that you are authorized to access that specific document.
Microsoft Purview information protection supports the Zero Trust security model by labeling and optionally encrypting files so that only authorized users can access those files, no matter where the files go. The information protection labels, and corresponding encryption are used to protect and secure files. Each time you open the file, you must prove that you have permission to access it.
What are Sensitivity Labels?
You can find sensitivity labels in your tenant at https://compliance.microsoft.com --> Information Protection --> Labels. Note that you must have at least the "Sensitivity Label Administrator" role to be able to create and edit Sensitivity Labels. This role is part of the Compliance Administrator role group (as well as a few other role groups).

Sensitivity labels allow you to attach a label to a file (Word, PowerPoint, etc.) or a container (SharePoint Site, Microsoft 365 group, etc.) and define a set of rules for that content based on its label. Below are a couple of scenarios:
I want to restrict access to content labeled "Highly Confidential" to a small group of executives.
I want to prevent users from outside the organization from accessing content that is labeled "Internal Only"
I want to identify content that contains Personally Identifiable Information (PII) and prevent it from being downloaded or emailed.
In this blog post, I will show you how to create a sensitivity label that uses a sensitive information type (See Creating custom sensitive information types in Microsoft purview to learn how to create a custom sensitive information type) to identify and automatically apply a label to specified content.
Use Case
Your company makes energy drinks. The ingredients and recipes for these drinks are carefully guarded secrets. If anyone, especially your competitors, were to acquire the secret formulas for your drinks, it would be devastating to your business. Your company uses Microsoft 365. Documents are stored and shared via Teams, Email, OneDrive, and SharePoint.
As an information security officer in my company, I would like to find all content within our environment that contains proprietary formulas and ingredients for our energy drinks. This includes documents that contain the keywords:
Cayenne
Caffeine
Taurine
Espresso
I have already created the sensitive information type (see the blog post, dated May 11, 2023: Creating Custom Sensitive Information Types in Microsoft Purview). Now I want to create the sensitivity label that defines the rules for using content identified by the sensitive information type.
Configuration
After ensuring that I have the appropriate administrative permissions, I will start at https://compliance.microsoft.com --> Information Protection --> Labels and click "Create a label".
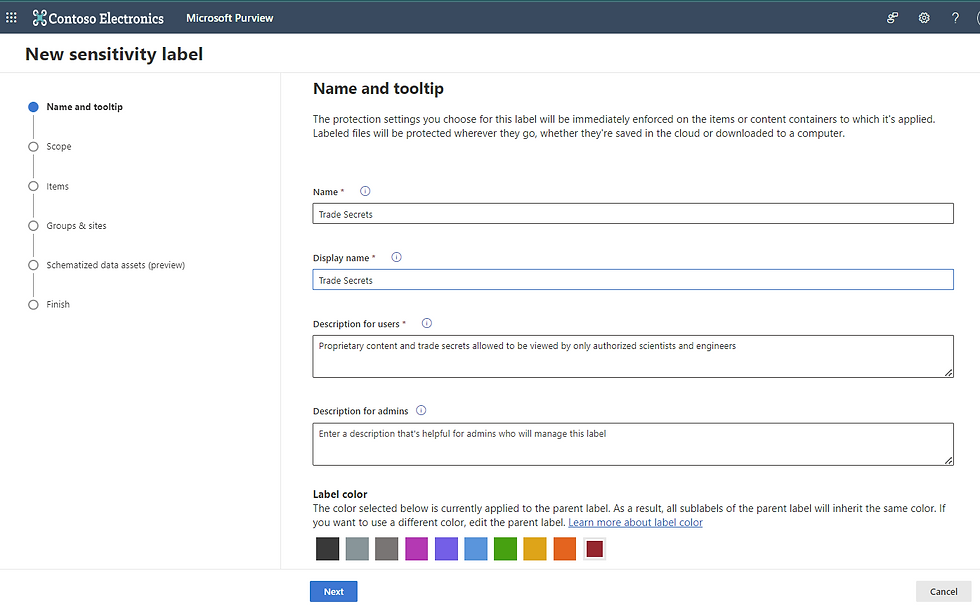
Step 1: Name your Label
Name the label. Set the display name and the tooltip description that will appear when you hover over the label. You can also set a description for admins (optional) and set a color for the label.
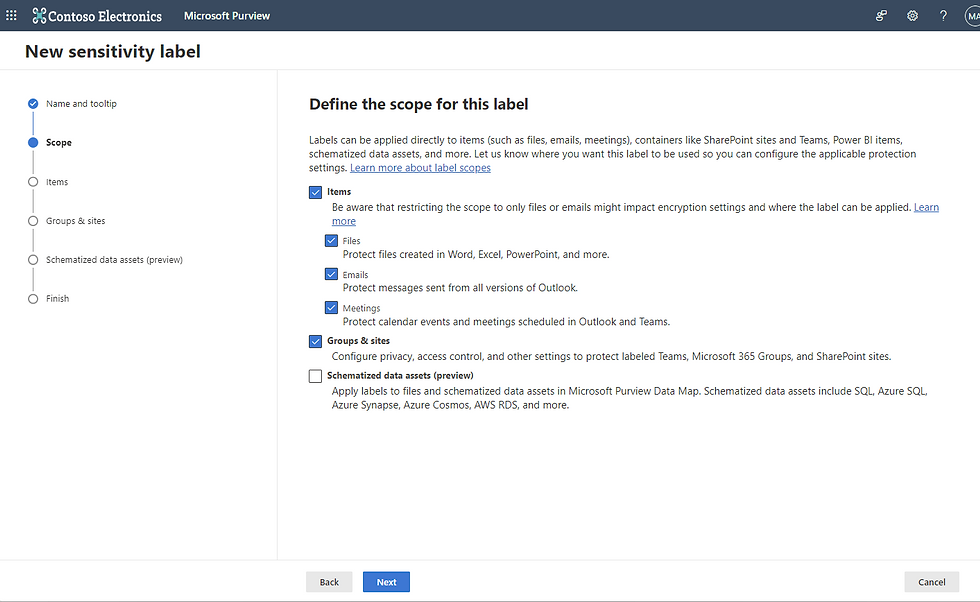
Step 2: Select the Scope
Where do you want the label to be applied? In this case, I am going to select all items--files, emails, and meetings as well as containers like Microsoft 365 Groups, Teams and SharePoint sites.
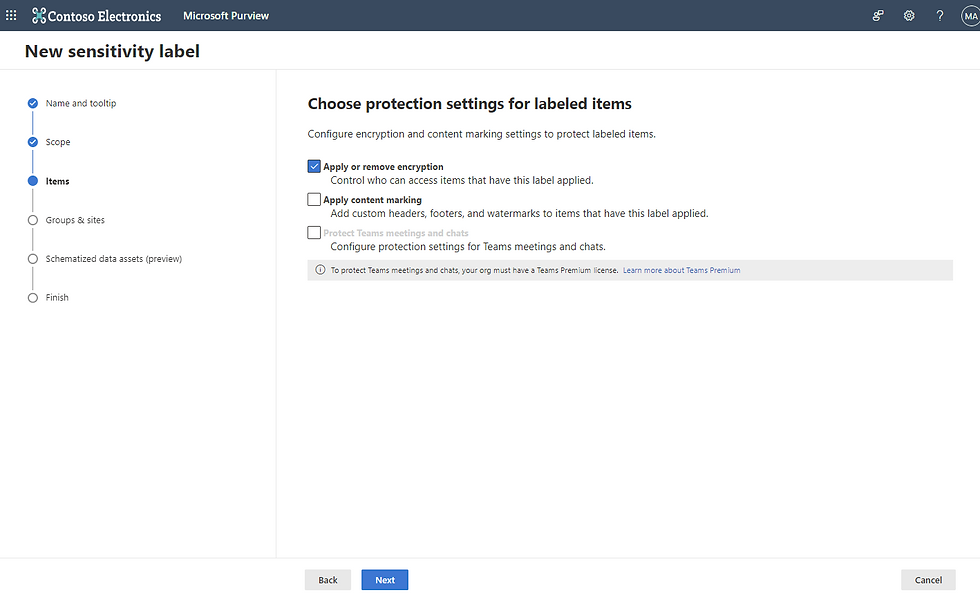
Step 3: Protection Settings
I want to encrypt documents and files that have this label so that the protection follows the document wherever it goes. In some cases, you may want to apply content marking (e.g., "Highly Confidential") to the document itself. In that case, you would select "Apply content marking) here as well.
Step 4: Encryption Settings
Now that we have specified that we want files with this label to be encrypted, we have to tell the system how the encryption should behave. In this case, we are assigning the permissions (instead of letting the user assign them). The content never expires and the users of this content can only use it offline (i.e., on a device that is not connected to the internet) for 30 days. We are also only allowing members of the "Project Team A" to access content with this label. And they will have Co-Author, which means they will be able to do everything that the owner/creator of the document would have except they won't be able to change permissions, save it as a new document, or change the label.

Step 5: Auto-labeling
Microsoft Purview Information Protection supports auto-labeling based on sensitive information types that can scan content for keywords. Auto-labeling will scan all files in SharePoint and OneDrive looking for keywords configured in the "Trade Secrets - Energy Drink Formula" sensitive information types.

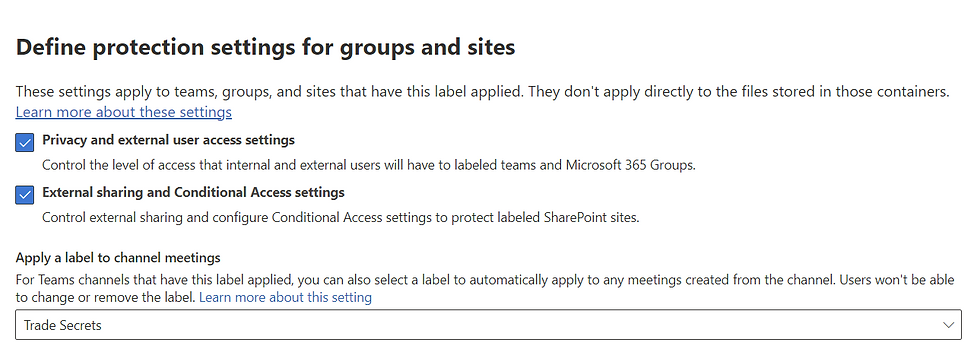
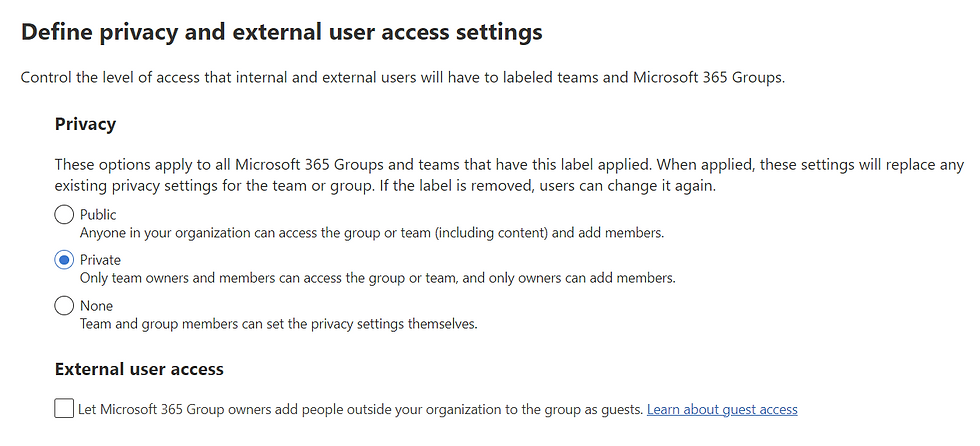
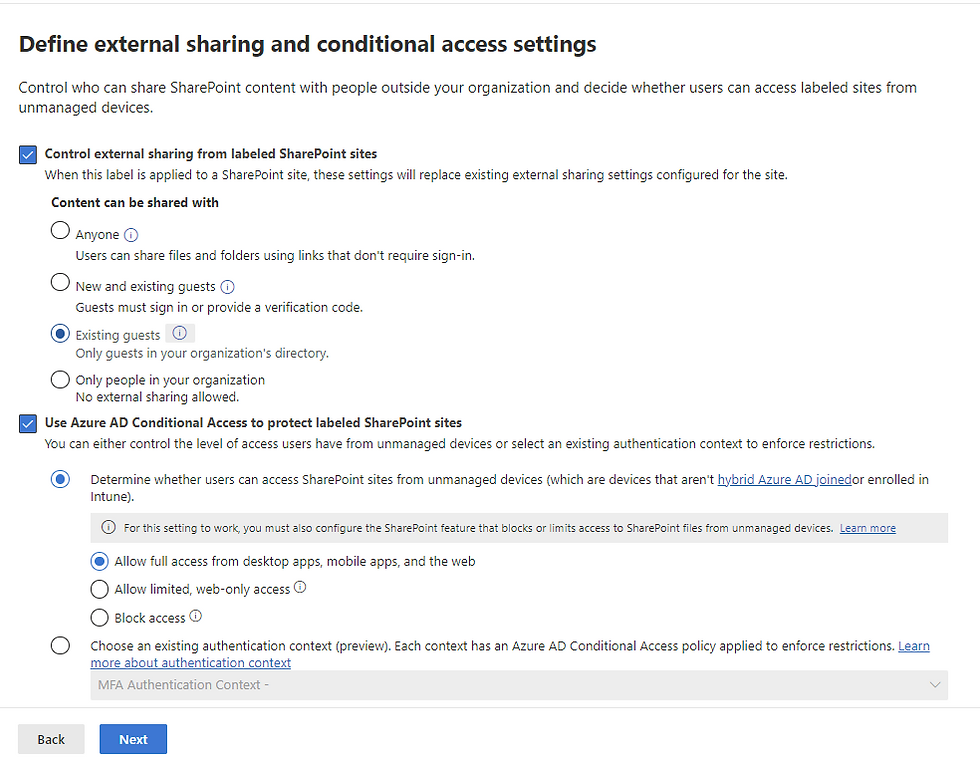
Step 6: Protection Settings
Protection settings for Teams, SharePoint sites, and groups allow you to control how items with this label are protected:
Control the privacy settings for Teams and Groups
Configure access for internal and external users to a SharePoint site with the label
Use conditional access to control the level of access users have unmanaged devices
The next few screenshots show the configuration that we are using for our fictional company.
And now we have a configured Sensitivity Label for "Trade Secrets".
Next Steps
In order to make the label available, we need to add it to a labeling policy. In the next post, we will configure a labeling policy and auto-labeling functionality to publish our label.
If you or your organization is working to follow the Zero Trust security model, start by taking Microsoft's Zero Trust assessment here: Microsoft Zero Trust Maturity Assessment Quiz | Microsoft Security.
If you need help interpreting the results, if you are developing a strategy for implementing Zero Trust, or you are looking for guidance on implementing Information Protection, let us help Contact | Peak Insights (peakinsightsconsulting.com).
Comments